Upgrading My Homelab with Self-Hosted Git and CI/CD using Gitea

Today, I took another step in enhancing my homelab. As a huge fan of the self-hosted community, I've spent the past year experimenting with my own home servers, running various services and applications. My latest project is aimed at solving a recurring concern: what happens if a drive fails or, more plausible, if I fuck something up.
In my professional life, these fears are mitigated by using version control, cloud-based infrastructure, and CI/CD pipelines for deployments. So I thought, why not apply the same principles to my homelab?
Why Not GitHub?
My first instinct was to use what I already knew—GitHub and GitHub Actions. While this seemed like a solid option, I had some reservations. For one, my code would be stored on GitHub's servers, which is a dealbreaker for many in the self-hosted community. While I'm personally okay with that, the self-hosting option was too tempting to ignore. Moreover, using GitHub Actions (in the cloud) to connect to my home server (on my local network) comes with complexities, especially since I don’t have a static IP address.
Exploring Gitea
After some research, I discovered that GitHub Actions and GitLab CI/CD have self-hosted alternatives. But I also came across Gitea, an open-source alternative that had everything I needed and is compatible with the GitHub Actions syntax.
Installation and Setup
My homelab runs on Proxmox, and I often use the Proxmox Helper Scripts repository to simplify service installations. Thankfully, there was an LXC container script available for Gitea, which made installation very quick and easy.
Setting Up PostgreSQL
The first hurdle was setting up a database for Gitea (I did not know this was a requirement). It supports both MySQL and PostgreSQL, but from what I read, PostgreSQL is the preferred choice of the Gitea team, offering better, quicker support. Luckily, Proxmox had a helper script for PostgreSQL as well. Here’s a quick summary of the setup commands I used:
# Change the PostgreSQL user password
passwd postgres

# Log in as the postgres user
su - postgres

# Change the admin password
psql -c "ALTER USER postgres WITH PASSWORD 'your-password';"

# Create a Gitea user with the appropriate role
CREATE USER gitea WITH PASSWORD 'your-password';
CREATE ROLE gitea WITH LOGIN PASSWORD 'gitea';

# Create the Gitea database and assign the gitea user
CREATE DATABASE giteadb WITH OWNER gitea TEMPLATE template0 ENCODING UTF8 LC_COLLATE 'en_US.UTF-8' LC_CTYPE 'en_US.UTF-8';

# Exit PostgreSQL
\\q
Configuring Gitea
Once Gitea was installed, I changed the IP address of the LXC to a fixed one so it would never change. However if you want to go quicker you can use the IP address which is showed at the end fo the installation process.
Once you visit your gitea page, you should be greated with a configuration page. Fill in the details of your postgres database and click on "install Gitea".

If all went well you should now have your own self hosted Gitea system. (I already added some repositories in the screenshot below.)

Setting up Gitea action runners
Next, I wanted to automate some deployment tasks using Gitea Actions. Both Gitea and PostgreSQL were running in LXC containers on Proxmox, but for the action runner, I used Docker Compose on my local Windows machine.

I used docker compose to setup a compose file for the action runner (which I just took from the Gitea documentation page)
version: "3.8"
services:
  runner:
    image: gitea/act_runner:nightly
    environment:
      CONFIG_FILE: /config.yaml
      GITEA_INSTANCE_URL: "http://192.168.1.72:3000"
      GITEA_RUNNER_REGISTRATION_TOKEN: "${REGISTRATION_TOKEN}"
      GITEA_RUNNER_NAME: "testrunner"
      GITEA_RUNNER_LABELS: "ubuntu-latest:docker://node:16-bullseye"
    volumes:
      - ./config.yaml:/config.yaml
      - ./data:/data
      - /var/run/docker.sock:/var/run/docker.sock
Getting the registration token
To register the runner, I needed a token. This can be generated by going to Site Administration from the user dropdown in the top-right corner of Gitea. Under Actions > Runners, I clicked "Create New Runner" to get the token, which I then inserted into the Docker Compose file (I still need to find a way to do this more securely but this is how I do it for now locally on my PC).

Fixing Runner Issues
When I tried running the Docker Compose file, I encountered an error: Gitea couldn’t find the config.yaml file because Docker had mistakenly created it as a folder.
2024-10-27 15:43:34 Error: invalid configuration: open config file "/config.yaml": read /config.yaml: is a directory
After deleting the folder and recreating it as a file, everything worked, and the runner appeared in Gitea.

Setting up the labels
The next issue I encounterd was that I used the wrong label in my docker compose. It is important to use the right labels. Otherwise the Gitea Action might not know certain actions. At first I got an error on the step: "actions/checkout@v4". After fixing the label to "ubuntu-latest:docker://node:16-bullseye", my issue was solved. More info on the labels can be found on the Gitea documentation.
Testing the action runner
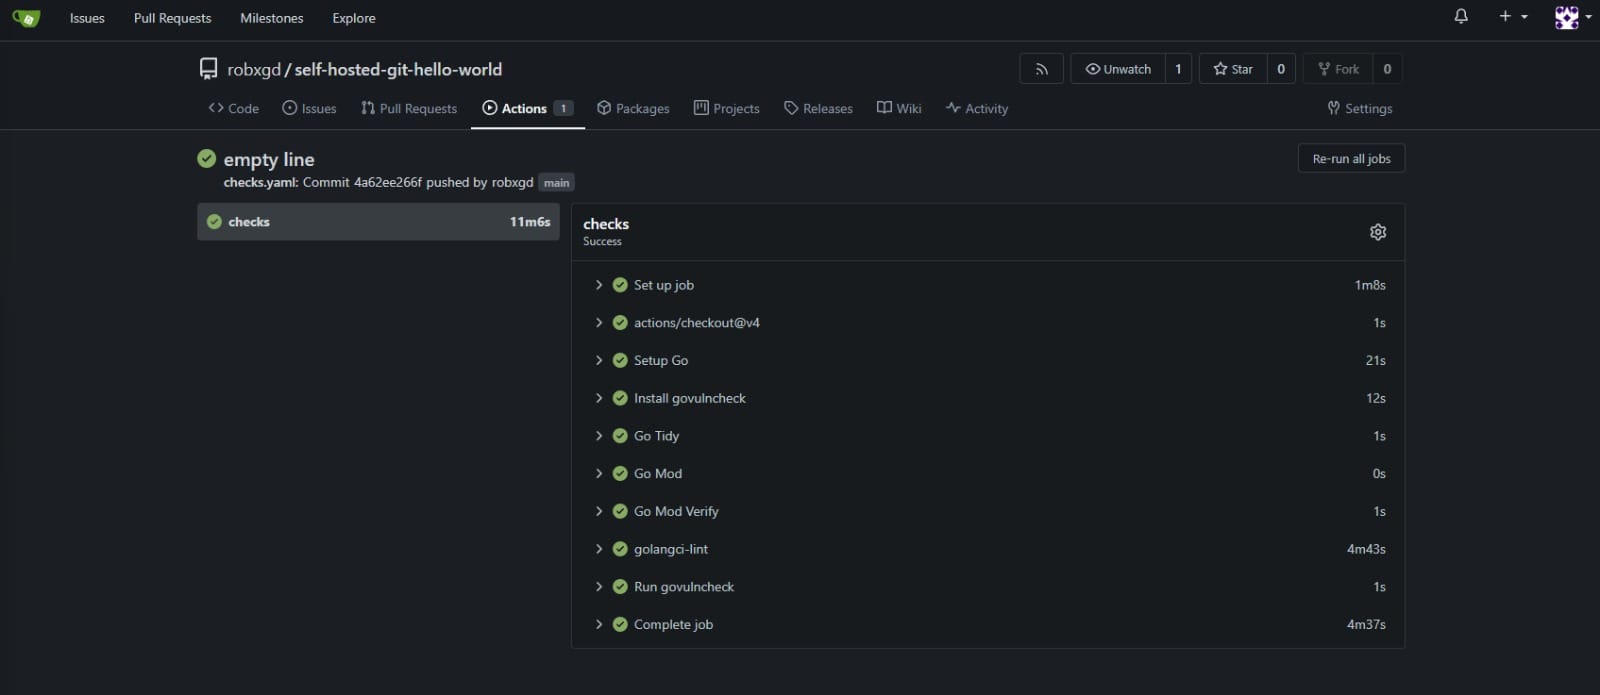
To test if everything was working I used the example of "The Homelabber". I cloned his/her example repository, linked it to my Gitea account, and pushed a commit. The action triggered perfectly, showing all green checkmarks!

Acknowledgments
This blogpost/guide is completely built with the help of the excelent blogposts of The Homelabber. Although (s)he does not have completely the same setup as me, the blog provided me with a lot of help. Next to that I have to say the Gitea documentation is very thoroughly and nicely written.
Next steps
I’m really happy with how this project turned out. The next steps include moving the action runner to Proxmox and setting up a reliable backup solution for my repositories. I’m still debating whether to sync them with GitHub, offload the code to cloud storage (Google One, OneDrive, Dropbox, etc.), or simply store a copy on my local NAS.
And so another small step has been taken to automate my entire homelab!
Keep on labbing! ;)